Setting up a temporary bathing station is both simple and convenient. Whether you’re camping, hosting a garden party or just want to rinse off after a swim, a portable shower can provide a refreshing solution.
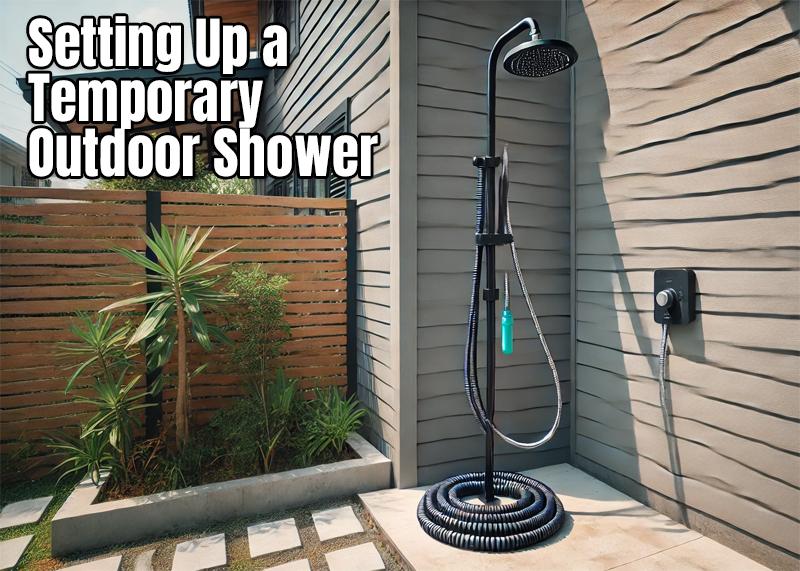
Let’s explore various options, including portable, solar-heated and DIY setups using basic materials.
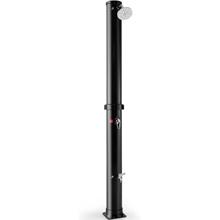
Portable Shower Units
Mobile units are user-friendly and typically include a water reservoir, hose and showerhead. Advanced models may have a pump for increased water pressure. Compact and easy to transport, they offer a comfortable rinse experience anywhere, ideal for outdoor adventures or temporary backyard setups.
- Capacity: Choose a unit with a water reservoir that meets your needs. These styles typically have a capacity ranging from 5 to 10 gallons, providing ample water for multiple washes.
- Portability: Look for lightweight and compact designs for easy transportation. Portability is key, so look for lightweight models that weigh around 1 to 10 pounds when empty, making them easy to transport.
- Ease of Use: Opt for models with simple setup instructions and user-friendly controls that you can have your shower ready in no time, adding convenience to your eco-friendly bathing experience.
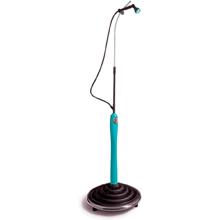
Solar-Heated Showers
Solar-heated models use the sun to warm water, making them eco-friendly and cost-effective. Typically featuring a black PVC bag or tank, they heat water throughout the day. Enjoy a warm, sunset rinse, blending sustainability and comfort. Ideal for off-grid locations and eco-conscious users, solar set-ups help reduce your carbon footprint.
- Sunlight Exposure: Ensure that your set-up is placed in a sunny spot for optimal heating.
- Water Temperature: Solar units can heat water up to 100°F (38°C), depending on the weather.
- Durability: Look for robust materials that can withstand outdoor conditions.
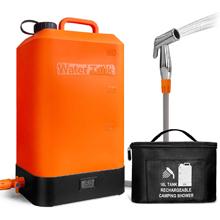
+ Battery Water Pump
with Moveable Spray Hose
10 Gallon Shower
DIY Shower Setup
Creating a DIY outdoor rinse area with PVC pipes, a tarp and a water source can be a fun and rewarding project. Customizing the height, size and privacy features allows you to tailor the setup to your needs, adding a unique touch to your outdoor bathing experience.
- Materials: PVC pipes, connectors, a sprayhead and a tarp for privacy.
- Water Source: Connect to a garden hose or use a large water container.
- Drainage: Ensure proper drainage to avoid waterlogging the area.
Tips for Hassle-Free Setup
- Choose the Right Location: Find a flat, stable area with good sunlight for solar units and easy access to a water source. Get ideas from these garden showers here.
- Secure the Components: Confirm that the structure is stable and secure, especially in windy conditions. See outdoor showers with bases here.
- Privacy Matters: Use a tarp or bathing tent for privacy. Consider natural screens like trees or bushes. You can even buy a shower surround kit.
- Water Management: Use a biodegradable soap to avoid harming plants and the environment.
- Regular Maintenance: Clean the sprayer and hose regularly to prevent clogs and ensure a steady water flow.
Optimal Outdoor Bathing Experience
To enhance your outdoor bathing experience, consider adding a few comforts:
- Soft Mat: Place a soft, non-slip mat (or elevated, self-draining mat) on the ground to stand on while showering.
- Hooks and Shelves: Install hooks for towels and shelves for toiletries.
- Natural Scents: Use scented soaps or essential oils to create a spa-like ambiance.
- Warm Up: On cooler days, wash during the warmest part of the day to enjoy the most comfortable temperature.
The Bottom Line:
Whether you choose a portable unit, a solar-heated option or a DIY project, each method has its unique benefits. With the right setup and a few added comforts, you can create an optimal outdoor bathing experience that combines convenience with the joy of nature.
Last Updated July 18, 2024